Today’s “ESPER Customer Story” is from Chris Thielemann a 3D light painting artist and photo booth company owner. We discuss how he combines light painting and bullet time / 3D photography techniques to produce some exceptional imagery.
After adding a bullet time effect to his setup, Chris is receiving more requests for booth rentals and significantly expanded his creative options when creating his work.
Enjoy the read.
Tell us about you and your work?
I like to combine different lighting setups, or light sources and use studio flashes with ambient light and flashlight. Using the multi-camera setup, I can freeze a moment and create glasses-free 3D images by using lenticular lenses.
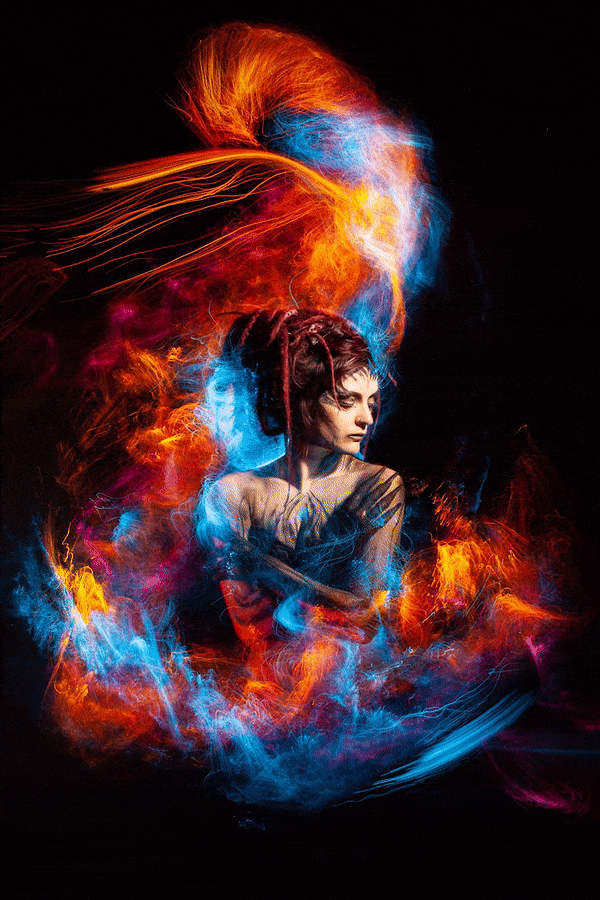
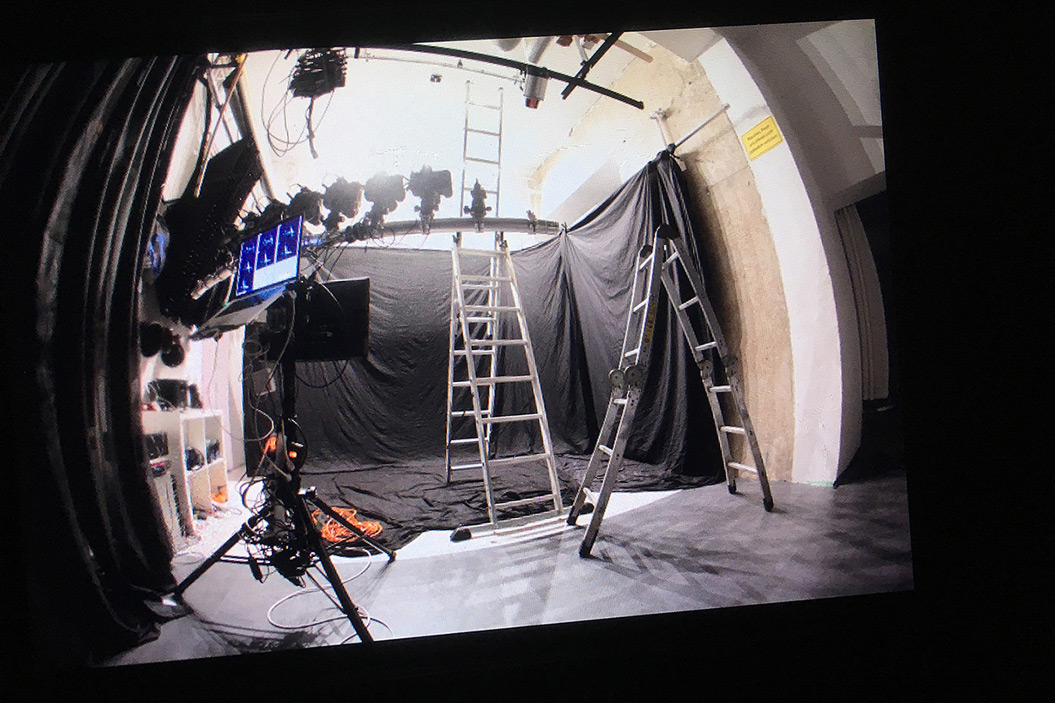
To create the above GIF, I photographed each sequence with my multi-camera array. All 10 cameras were triggered at the same time using the ESPER TriggerBox. The model was lit by a studio strobe to freeze her, the rest I painted with the black fibre brush and some colour gels.
There is no post-editing. The pictures are taken straight out of the cameras – so no Photoshop, or After Effects manipulation. I just optimized colour and contrast in Lightroom.
There is no post-editing. The pictures are taken straight out of the cameras – so no Photoshop, or After Effects manipulation.
Below are some examples of how the image was lit.
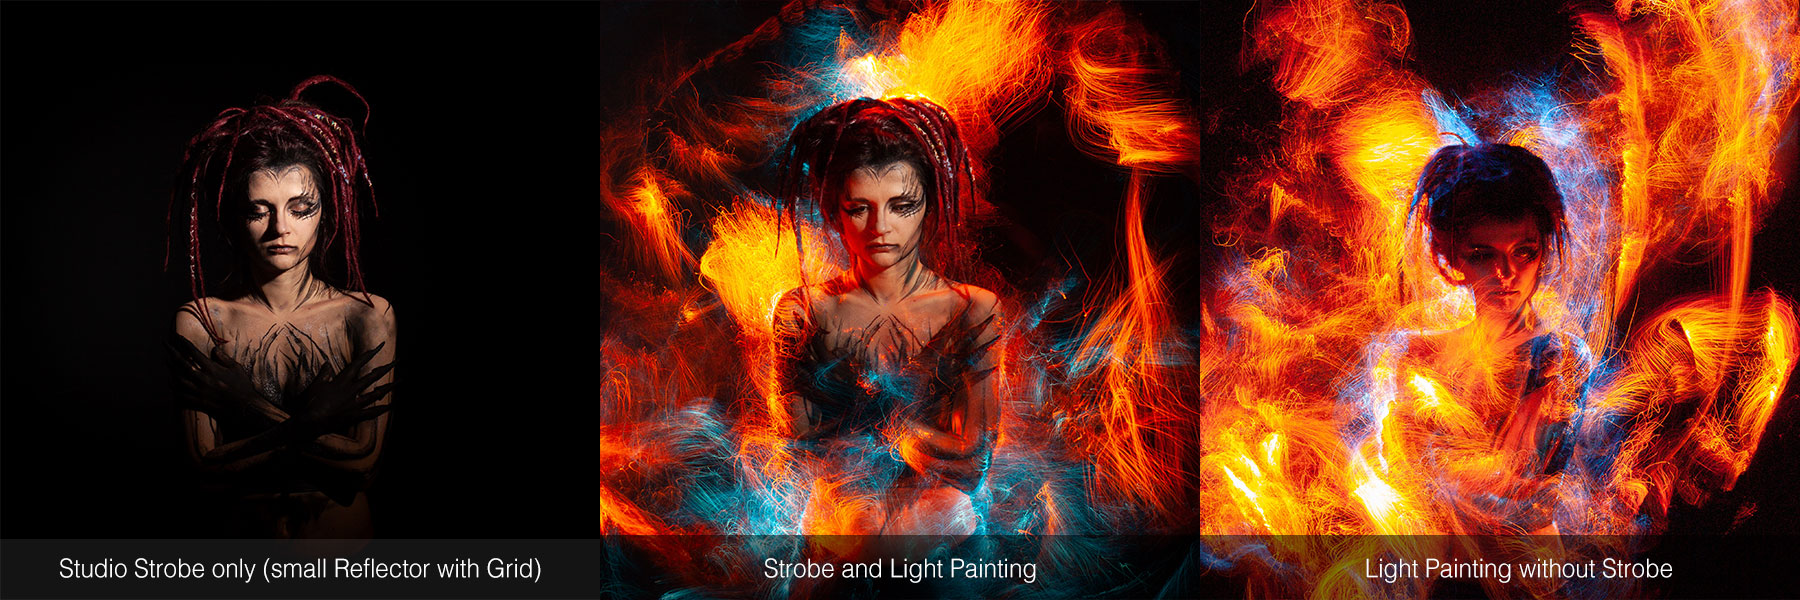
On the left side, you see the effect of the studio strobe. I’ve used a small reflector (you could also use a speedlight) with grid for hard and focused light. With a short flash burst, to get a razor-sharp face because of the very short flash speed.
The picture in the middle is the combination of the Lightpainting and the strobe. Very well balanced. The Shadows on the models face are lighten up by the light-painting brush.
On the right side, the light only comes from the flashlight/torch. So it’s not very well balanced – the face is too dark. You could put more light onto the face with the flashlight, but with an exposure time about (180s) the photo would be blurry.
What are your using in your multi-camera array?
You can do basic bullet time photography on a budget.
I’m currently using 11 to 12 cameras in my studio and 6 cameras as a mobile solution. I started with 5 cams and added more over a period of several months.
You can do basic bullet time photography on a budget. I’m currently using 11 to 12 cameras in my studio and 6 cameras as a mobile solution.
When I started I’ve purchased a Breeze software license for DSLR Remote Pro Multi-Camera. A solid solution that you buy once and use it without any further costs.
Later, I additionally got a Xangle Camera Server license for events, because it’s faster in setting up the cameras and extremely fast in creating the videos. This software is only licensed for a period of time so it’s necessary to do events to refinance it.
Have you tried any other multi-camera triggers?
Yes, I started with wireless YongNuo triggers, to fire up to 7 cameras in my first setup. But, there was a problem was the sync speed. When I needed a 100% sync, I had to use long exposure times (more than 2s) and fire my flashes manually when all shutters were open.
When using faster shutter speeds and firing the flash with one of the cameras, the hit rate (all cameras in sync) reduced extremely. Quite a pain and a process that slows down a photoshoot significantly.
For starting out on a budget and if you only do studio work for yourself it’s ok, but definitely not fun to use. It limits the possibilities – photo shoots had to be in total darkness because of the shutter speeds.
With that set-up, events were not possible.
Why is the multi-camera trigger so important to you?
So basically I had several reasons.
The first was to improve the photoshoots in the studio. It’s a pain to shoot in total darkness and fire the flash manually. The previous triggers I’ve used were very slow and you can’t do action photography with moving subjects.
The second, more important reason, are bullet time photo booth events. You need a shutter speed sync time faster than 1/40s to get sharp images of people. So the choice is to buy a trigger that can do that, or to invest more money in a software solution that does not need a trigger at all.
The previous triggers I’ve used were very slow and you can’t do action photography with moving subjects. [For bullet time] you need a shutter speed sync time faster than 1/40s to get sharp images of people.
At this time, the software solution is not an option due to the costs (more hardware, software costs, abonnement costs) and for a small rig like mine with 12 cameras, it’s not needed. As of now, I put my focus on my 3D work and 12 cameras are just fine for that.
So, the ESPER TriggerBox is the right choice for me – pay once and use it forever!


Click here to see ESPER TriggerBox customer gallery.
So, what convinced you to buy ESPER TriggerBoxes?
For synchronization speed – TriggerBox does the job. It speeds up my photoshoots and I always get reliable results – in every shot, every camera is accurately synchronised. Unlike the tested wireless trigger solution. Thanks to ESPER TriggerBox I can use my multi-camera setup like a single camera!
TriggerBox does the job. It speeds up my photoshoots and I always get reliable results – in every shot, every camera is accurately synchronised.
Also, events are now possible – even with more options like setting a time delay. So, it’s a very big improvement compared to the wireless triggers.
But, as a small photography business owner, I was hesitant because of the cost. Normal income goes to pay all bills and feed the family. Any left money, I invest in building my rig – and that’s not much, because the costs multiply with every camera.
As of now, I have 12 cameras in my rig (plus some more backups) – so that’s quite insane ;). When you don’t have a ton of money to spend you have to think carefully about your next purchase. So, even small things like camera mounts, cables, metal pieces etc. will add up.
What results have you seen since using ESPER boxes to create bullet time effect?
I have more control and confidence in my rig.
Once the cameras are set-up, I can concentrate on my images instead of on my camera triggers. A really a big plus for me compared to wireless triggers! Before that, I had a ton of ruined shots because not all cameras were in sync. An extremely frustrating process that happened too often. Now, I can use every shot.
Besides the significantly increased productivity in creating my work, I have some requests for small bullet time photo booth events. Without the ESPER TriggerBoxes I wouldn’t be able to attend them.
I can also set the cameras to bulb exposures and shoot for many minutes – that’s needed for my light paintings (with the wireless triggers you are limited to 30s exposure if you are not holding down the button on the release).
I’m able to create artworks that I couldn’t create before. I can experiment and try out new light painting techniques and test out what I can do with 3D. It’s nice to have a bullet time/3D animation of a light painting that I could share on social media.
But on top of that, I can also print out the photo shoot results and laminate them onto a lenticular lens – a glasses-free 3D image. A whole new world waiting to be explored!
Learn more about ESPER TriggerBox
More interviews: